Electrical mishaps can happen at any time because of damaged electrical wire. and a damaged electrical wire is common issue and very risky for electrical activity. You have to be more careful for taking any kind of electrical services with wire. Sometimes, all electrical activities are disconnected and distracted by damaged wires. Repairing damaged wire is a task that requires caution and methods to ensure safety from preventing any mishap on the spot. Following the same process for how to repair damaged electrical wire in wall. 24 hour electrician singapore is available to fix any wiring issues. Let’s move on to discuss in detail on how to repair damaged electrical wire.
Essential Tools and Materials for repair damaged Electrical Wire
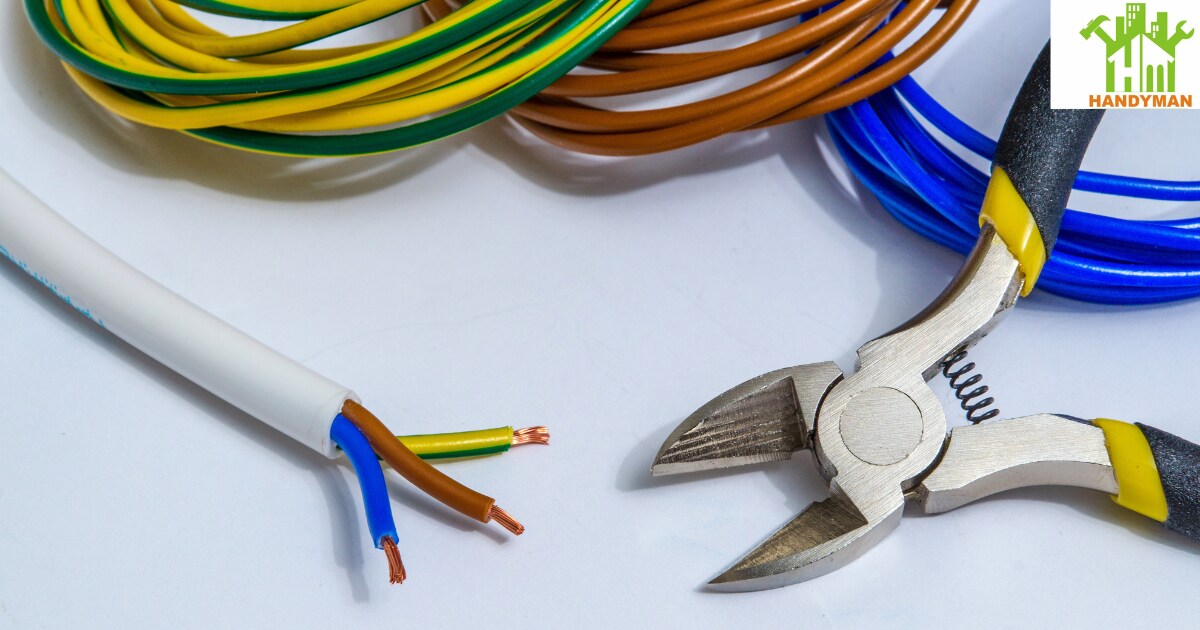
- Wire stripper
- Electrical tape or heat shrink tubing
- Wire connectors (if needed)
- Screwdriver
- Multimeter (optional for testing)
Step-by-step Process for Damaged Electrical Wire
Step 1: Ensure Safety First
Before starting the repair process of wire, it’s a precondition to turn off the power to the affected area. Locate the circuit breaker or fuse box and switch off the power. Confirm that the line is off with using a voltage tester.
Step 2: Assess the Damage
Carefully inspect the damaged wire properly. Identify the the damaged nature and based on the condition of wire whether it requires repair or replacement. If the damage is minimal and the affected area in the slightest, the repairing option is sustainable and long-lasting.
Step 3: Cut and Strip the Wire
Use a wire stripper carefully to cut the damaged part of the wire. Be conscious of stripping about 1 inch of insulation from both ends of the cutting wire. In this way, expose the conductive copper wire for the next steps.
Step 4: Twist the Exposed Wires Together
If the wire is stranded, twist the exposed strands between two parts of the wire. This is bond for a solid connection and proper conductivity overall.
Step 5: Use Wire Connectors (if necessary)
If the damage is more extensive, the wire is solid or it is difficult to adjust the wire, you may want to use wire connectors which help to connect the wire easily. Connectors provide secure and insulated joints without risk-free. Twist the wires together and secure them in the appropriate-sized wire connector. Make sure the connection is tight perfectly.
Step 6: Insulate the Repair
To prevent the risk of electrical shock, insulate the repaired section using electrical tape or heat shrink tubing. While using electrical tape, wrap it tightly around the exposed wires which cover the entire repaired area. If you’re using heat shrink tubing, slide it over the repaired section and use a heat gun to shrink it into place.
Step 7: Test the Repair (optional)
Test the repaired wire to ensure continuity and proper conductivity of wire. This step is optional but can provide added assurance that your repair is successfully done.
Step 8: Restore Power
Once you’re confident in your repair after the accomplishment of repairing the damaged wire, you can safely restore power to the circuit. Monitor the affected area for any signs.
When to call Professional for Damaged Wire
For encounterment of extensive damage in the home for wire, it’s urgent to know for when to call professionals. Like exposed wires, frayed insulation, and signs of burning. In this situation, prompt immediate professionals help to avoid any type of risk. Most of the time, Attempting DIY fixes can cause serious safety risks and lead to further damage or electrical hazards. Professional electricians easily assess the extent of the damage with their experience and knowledge for identifying potential underlying issues. Don’t delay calling a professional if you notice abnormalities, risks, impossibilities, and much more that are not possible to solve except for professionals as damaged wires can cause electrical fires or pose a risk of electric shock. Prioritize your safety and that of your home by entrusting electrical repairs to qualified professionals for a swift and secure resolution.


